CoU vs VC: BR part 1
The vamps rolled for their spells. For the Necros he got Invoc & CoY, the 2nd got Invoc and Gaze and the Vamp got Invoc and The movement spell.
We lined up across from each other and he won the roll to go first.
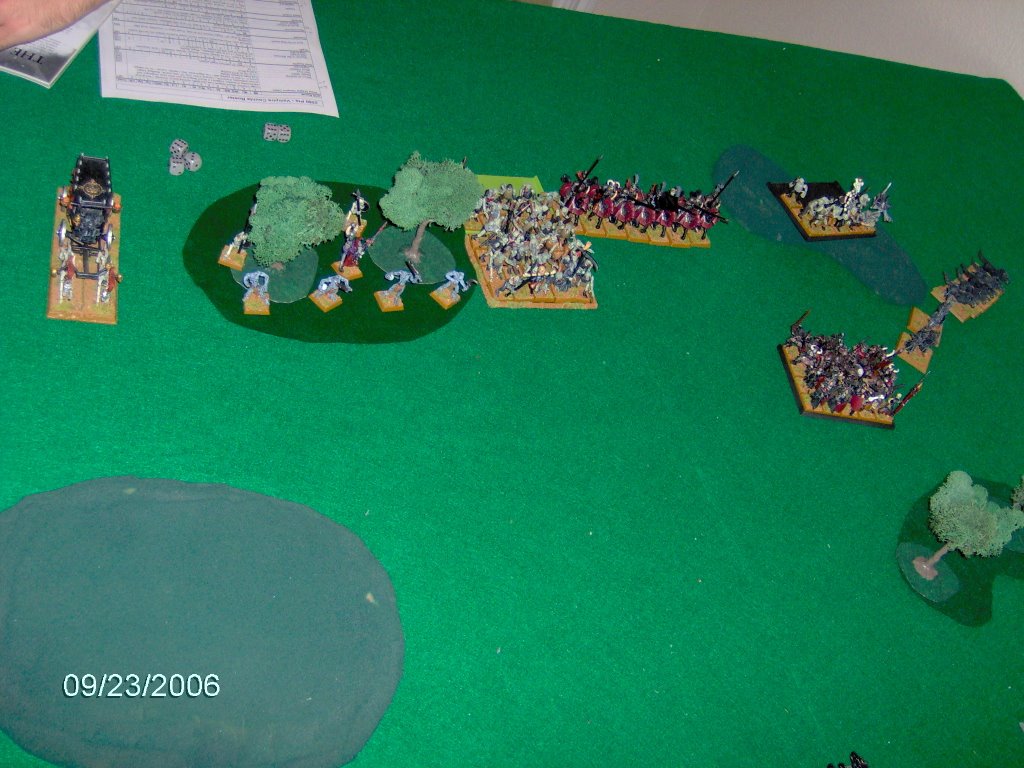
Turn 1a: with no charges he moves everything up. From left to right he has:
Black coach, ghouls in the woods with necro 1. Then the unit of 30 zombies with a wraith. Black knights in the back with the Vamp and the grave guard in front of the knights.
Small unit of zombies on the hill with the other necro. The spirit hosts and direwolfs on the flank.
In magic he moves the graveguard up and out of the way. Raises a unit of 10 zombies he puts just on the edge of the hill on my left flank. Kills 2 dogs with the flaming rod.
Turn 1b: The flank of the zombies was too sweet to pass up and so charged in, did a couple wounds and he is down to 5 zombies. But the hound unit is right in front of the Black Coach and I can feel it barreling down quick.
The fast cav on the very far flank (not seen) moves up and shoots at the direwolves killing 2.
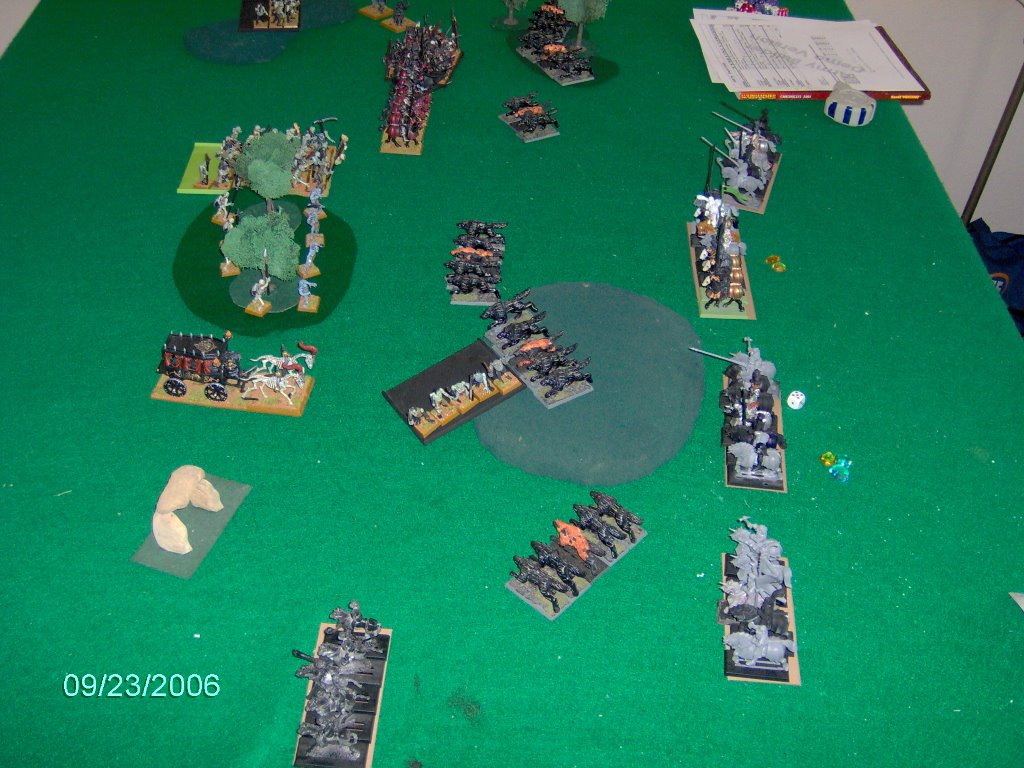
In the pic, you can see my DoW fast cav on my far left flank. The wolves are my hunting hounds and the oarnge ones are my hunt masters. So I move a lot of guys up and this is how the turn ends.
Turn 2a: The black coach rumbles into the hounds. The Black knights charge, the grave guard charge the hounds in the woods, the spirit hosts charge the other hounds in the woods. All 3 hounds flee. The unit of 3 only run 6" and are caught and run down. The rest are failed charges except the black coach.
The Direwolves charge the DoW cav and whiff, and are wiped out for their efforts.
In magic he raises a new unit in the middle of the field. he also tries hard to get his black nights in with his dance spell, but I managed to stop the book and his casting.
In combat, the black coach does only 1 impact hits, which wounds but that was it. With 4 attacks I hit and kill 3 zombies, win by 4, the zombies turn to dust and the BC down to 1 wound. WOW!!!
Here is what it looked like at the end of turn 2a:
Turn 2b: Here things got a bit dicey. I had to do something and I knew it was risky, but decided it needed to be done. I went aggressive.
First things, the 3 wolves failed their terror test and fled right into the unit of zombies and was destroyed.
But the hound unit on my far left, made their terror test, then passed their fear test and hit the flank of the black coach.
Grandmasters unit of IC knights and BSB Priest charge the small unit in the middle of the field.
The unit in front of the black knights side steps a few inches and prepares for the worst.
The 2 WW units on the left flank swing around to help support the middle.
On the right flank, one unit of WW charges the spirit hosts. Unable to hurt them, they win by 1-2 every round of combat till the hosts finally crumble in the last turn of the game.
The WW unit on the far flank, charges the unit of 10 zombies with the necro. I make my fear test but am 14 1/2" out. Just missed it. Ugghhh!! This hurt a lot.
The archers move and around.
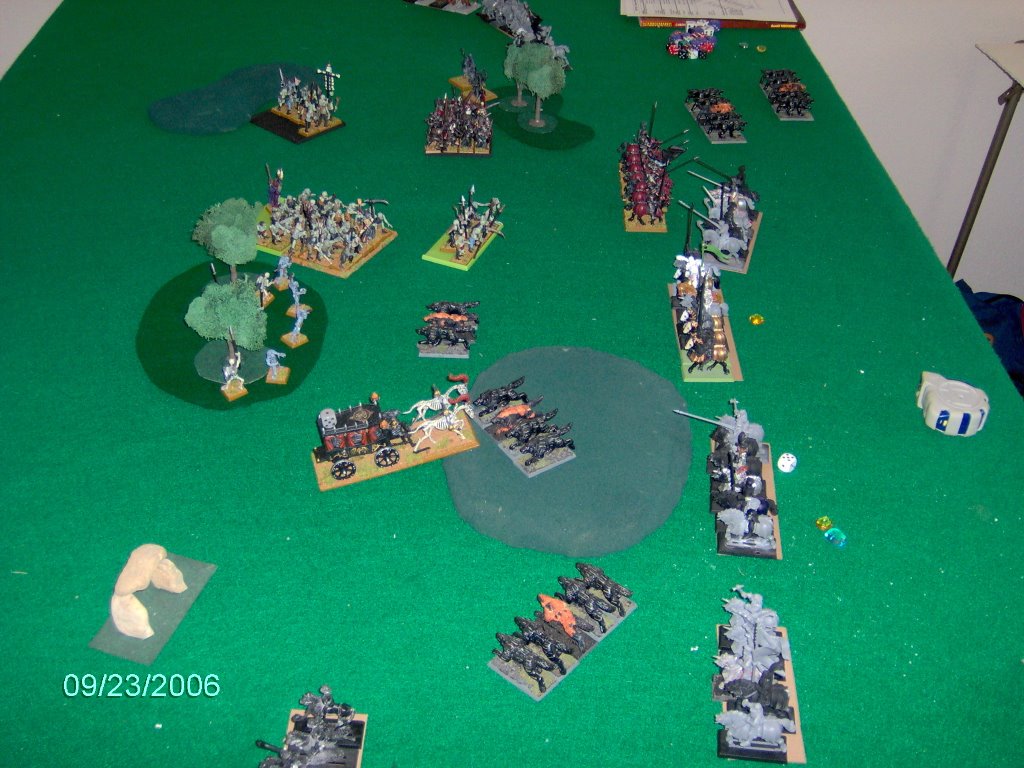
In combat, the black coach whiffs. I do manage a wound on the BC, but he makes his ward save. But it pops anyway. The newly charging hounds feel it and charge forward hitting the ghouls. The GM with IC WW, destroy the unit of 9, overrun into the large unit of zombies.
One of the fleeing hounds rallies and moves to the flank of the Black knights.
Here is the setup at the end of turn 2, start of turn 3:

At this point we misplaced the camera, so there will not be anymore pictures. So you will have to visualize.
Turn 3a: His black knights and vamp charge the WW knights with priest in front of them. They hold, to my opponents surprise and make their fear test.
The grave guard turn to their left facing my generals flank. I stop the book, but I can't stop his generals casting of dance and into the flank of my general they go.
His small unit backs up.
In hand to hand, his black knights with Vamp kill every knight in the unit. Leaving only the Priest there. So Using the Rod of Command I stay. He knows he is in trouble.
The hounds kill only 1 ghoul and they slaughter the dogs, who almost make their insane courage roll (rolled a '3'). The last 2 flee and get away.
In the big combat in the middle. Since both of us charged, we roll to see who goes first on those tied with initiative. I win, so everything goes at the zombies. I kill 9, (boy does hatred really work) and with my General's Laurels it counts as 12. Add in the banner, warbanner and BSB. It more than makes up for his 1 kill, 3 ranks, flank and standard. I end up winning by around 6 and he crumbles badly.
Turn 3b: This is the make or break turn. Knight unit with priest into the flank of the black knights. My knight unit into the small unit of zombies with necro. And hoping they would have better luck, my hounds on the hill into the ghouls. And the hounds over by the black knights into the rear of the grave guard.
On the left flank no problem as the hounds hit the ghouls. And the WW knights with priest had the spell up making them immune to fear. But on the right flank, the hounds refused to charge and help the general. and the WW knights would not budge to hit the small unit. Ugghhhh!!! Damn fear.
The 2 fleeing hounds did rally.
Both DoW units circled towards the middle of the field.
I screwed up with my knights and moved them to the top of the hill.
In combat the hounds killed another ghoul, but the ghouls just destroyed the hounds killing all but the hunt master who fled. He got away, but under 25% could not rally. The ghouls pursued and put them right behind my knights on the hill.
The Vampire Lord issues a challenge. The priest with the rod accepts. With 5 attacks needing 3+ and 3+, he hits 4 times and wounds 4 times. Uggghhh!!. Needing a 4+ to save, I fail all 4!!! NOOOO!!!
So I need some serious wounds with the charging unit. With 6 attacks needing 3+ to hit, 3+ to wound, I get 2 wounds. Ughghh!! On a 4+ he saves 1, so I only kill 1 knight. He ends up winning by 2. I'm still immune to fear. In range of my general and BSB, I am not worried. Needing a 7 not to break, I fail, re-roll, I fail again.
I roll 11" and get away from the knights who only go 8. But I hit my own unit on the hill, causing panic to them, hop over them and into the ghouls and am auto-destroyed.
I do make the panic test.
In the middle a couple knights fall, but with the general pulling down some serious combat res, I still win by several and more crumbling ensues.
This is the end of part 1 of this great battle tune in to part 2 coming soon.
posted by Ben at 9:07 PM
![]()
![]()

2 Comments:
I find your pictures in this battle report much more illuminating than in the previous report. I'm not entirely sure why though. Maybe it was consistently taking them all from the same table edge and from center of that edge. Or maybe the armies were just more compact this game.
I agree, I think 2 things.
1. Only 1 picture per turn, so your not trying to jump back and forth between pictures.
2. All from the same angle.
I do hate that sometimes the very far right flank gets cut off, but its something I can live with. Just wish the wife had not walked off with the camera after turn 3.
Post a Comment
<< Home